Podman remote container host setup via Vagrant VirtualBox
Prerequisites:
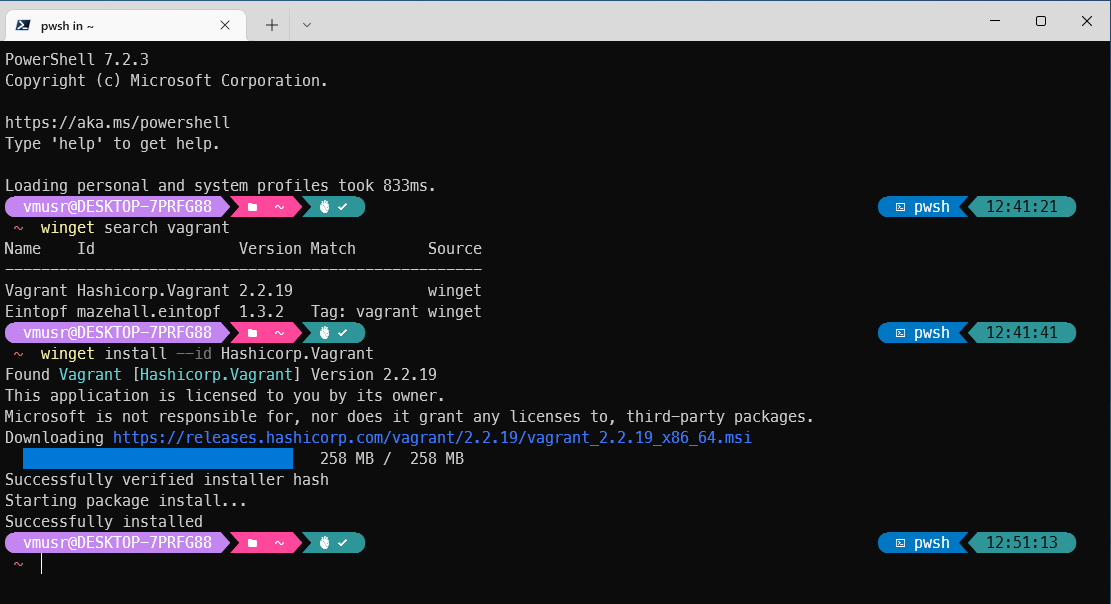
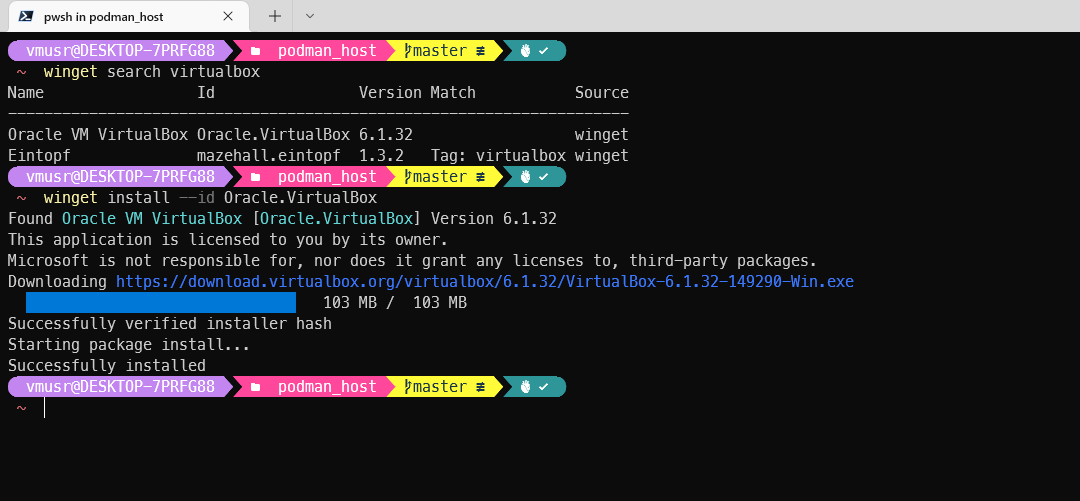
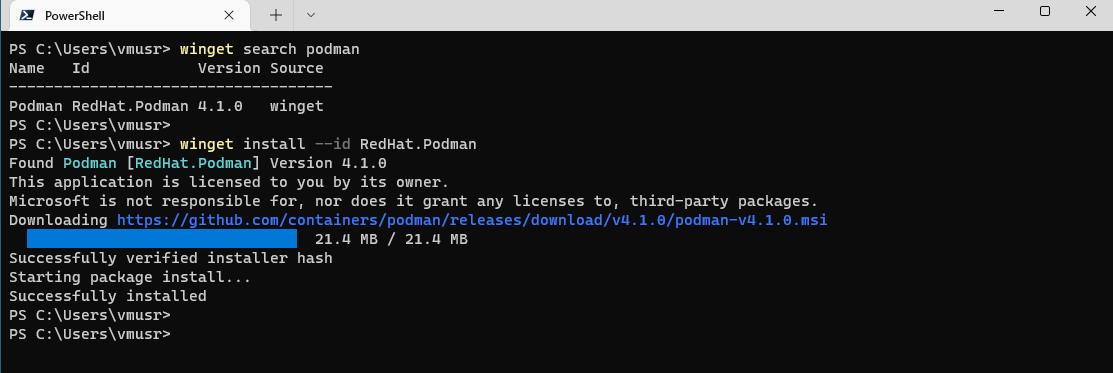
Vagrant, VirtualBox, and Podman Windows Client can be installed from winget (Windows Package Manager Client) command line tool on Windows 10 & 11.
winget install --id Hashicorp.Vagrant
winget install --id Oracle.VirtualBox
winget install --id RedHat.Podman
Notes:
- You need to re-open command line window to be able to use Podman cli program
- You may need to reboot the computer for VirtualBox virtual network driver to take effect.
Setup:
- Git clone the main branch of the repository.
- Inside the git clone folder, run
vagrant upto create the Vagrant environment in PowerShell, during vagrant up execution, you may see the following message: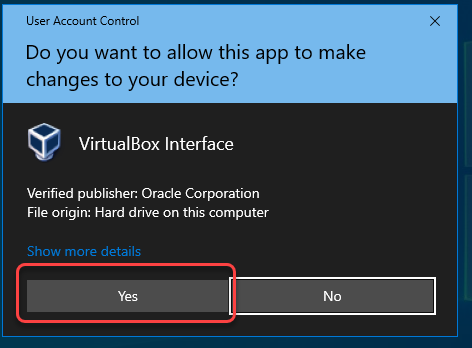
Be sure to click the “Yes” button to grant the elevated privileges, the whole execution messages will be displayed like following: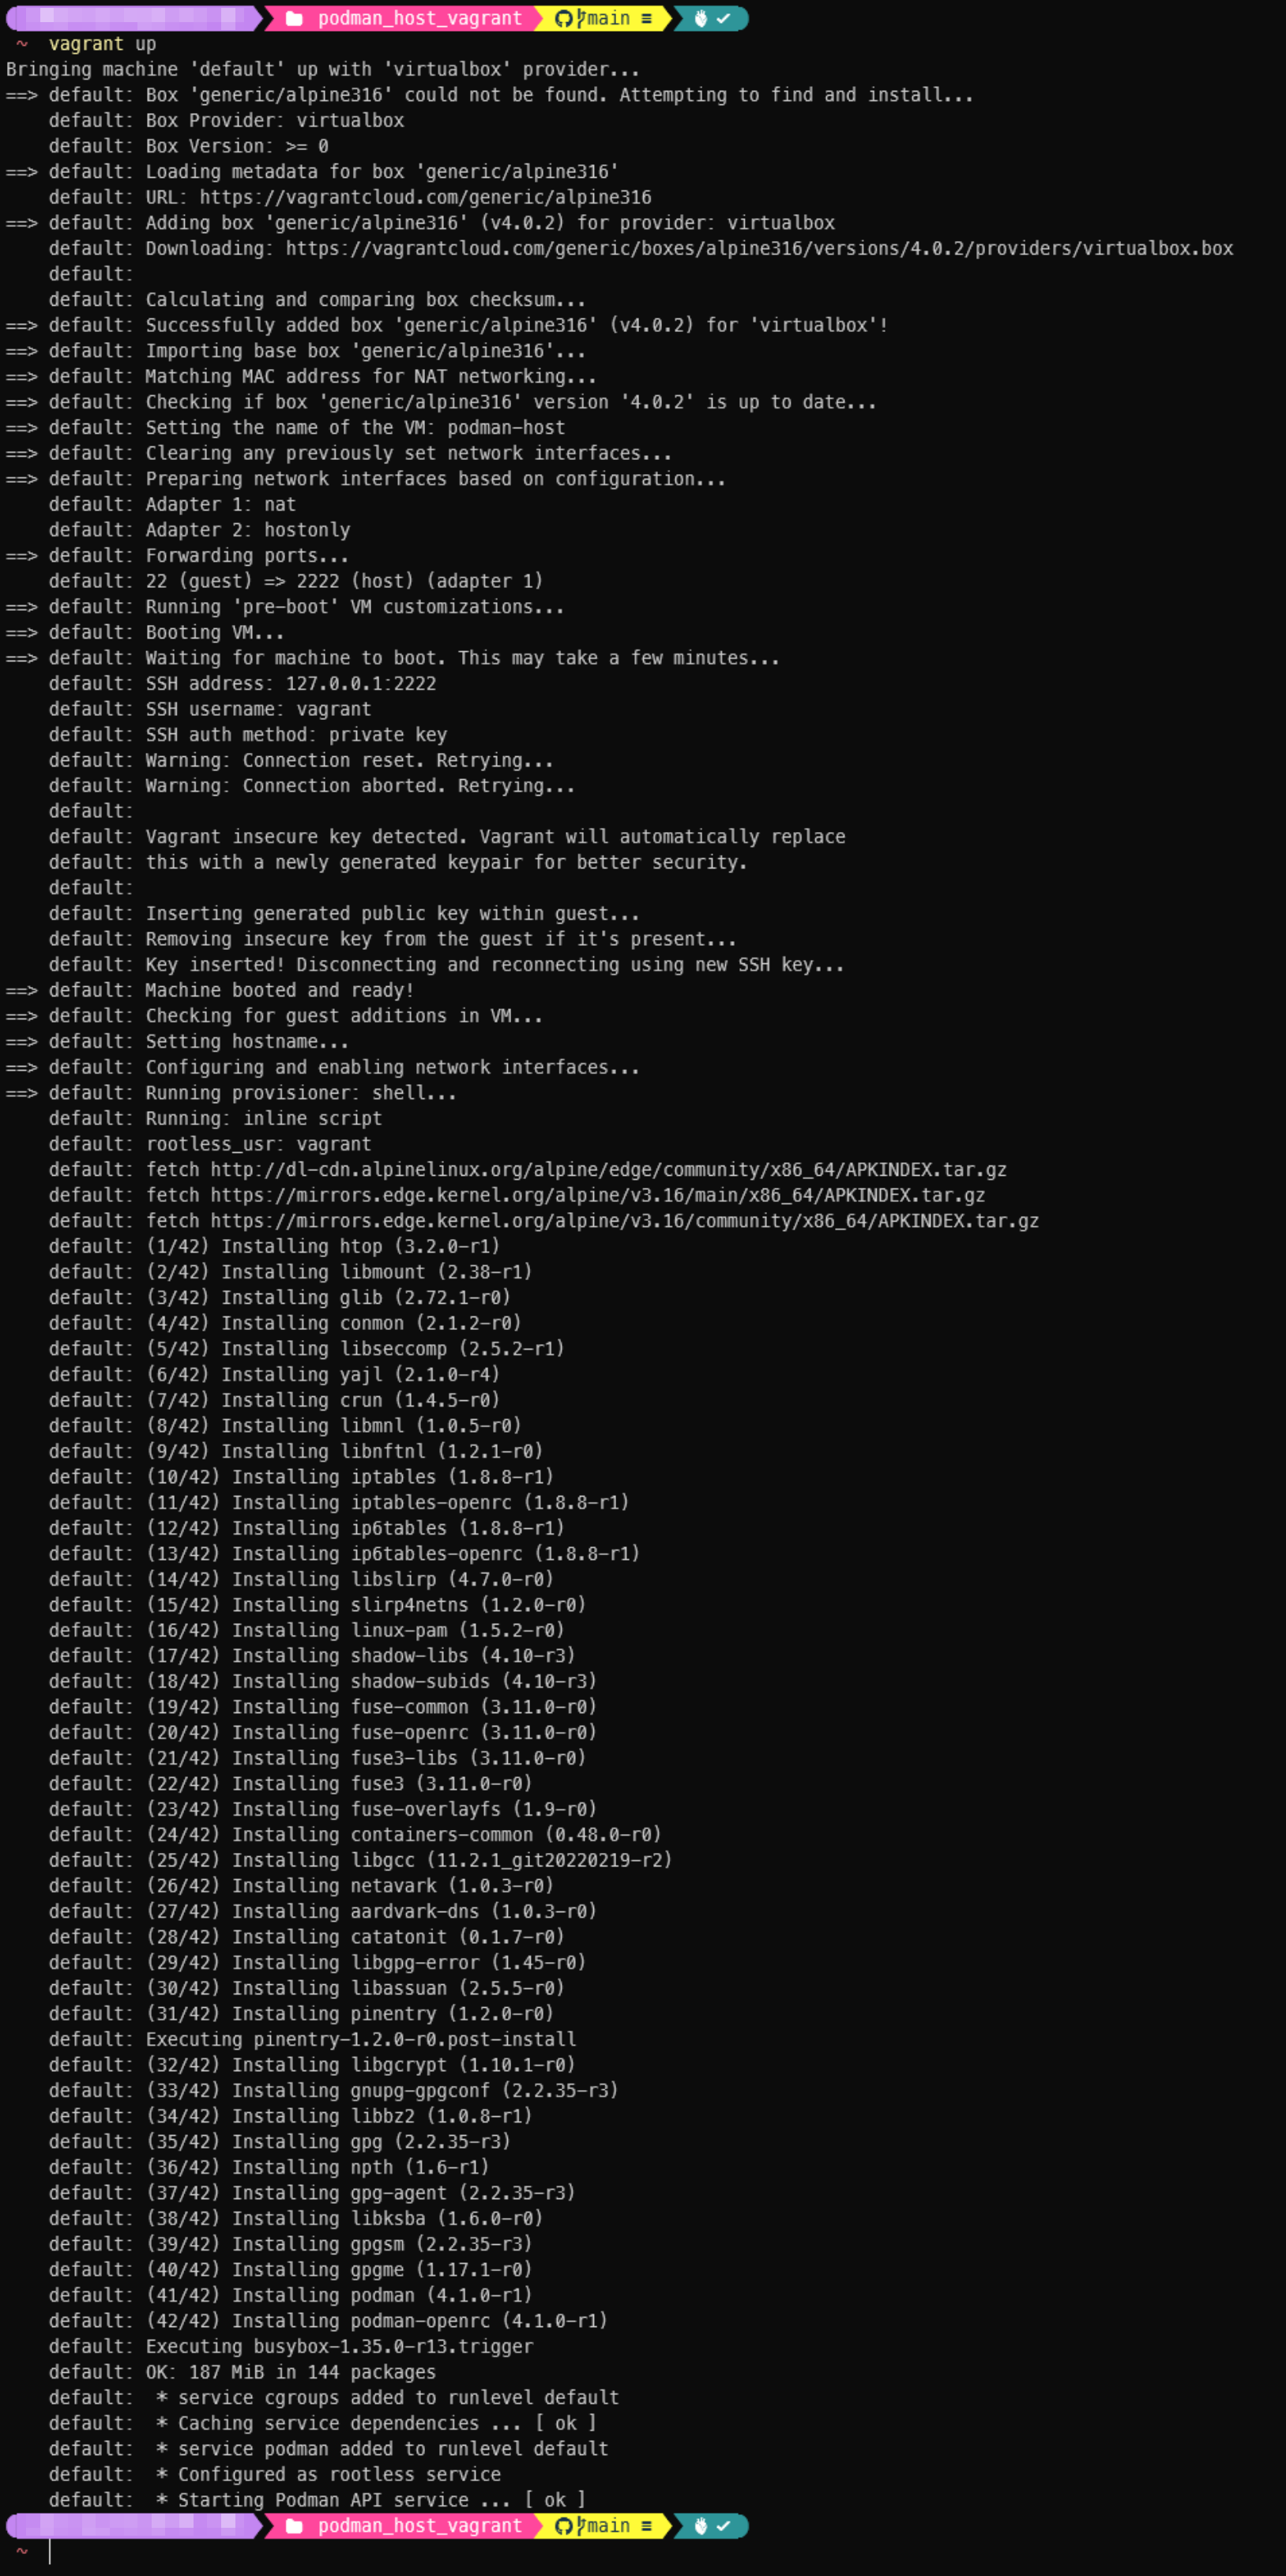
- Generate an ed25519 SSH keypair files on Windows host, if you’ve never created before:
ssh-keygen -t ed25519 - Copy the generated public key into the Vagrant Virtual Machine by following command in PowerShell:
type $env:USERPROFILE\.ssh\id_ed25519.pub | vagrant ssh -c "cat >> ~/.ssh/authorized_keys"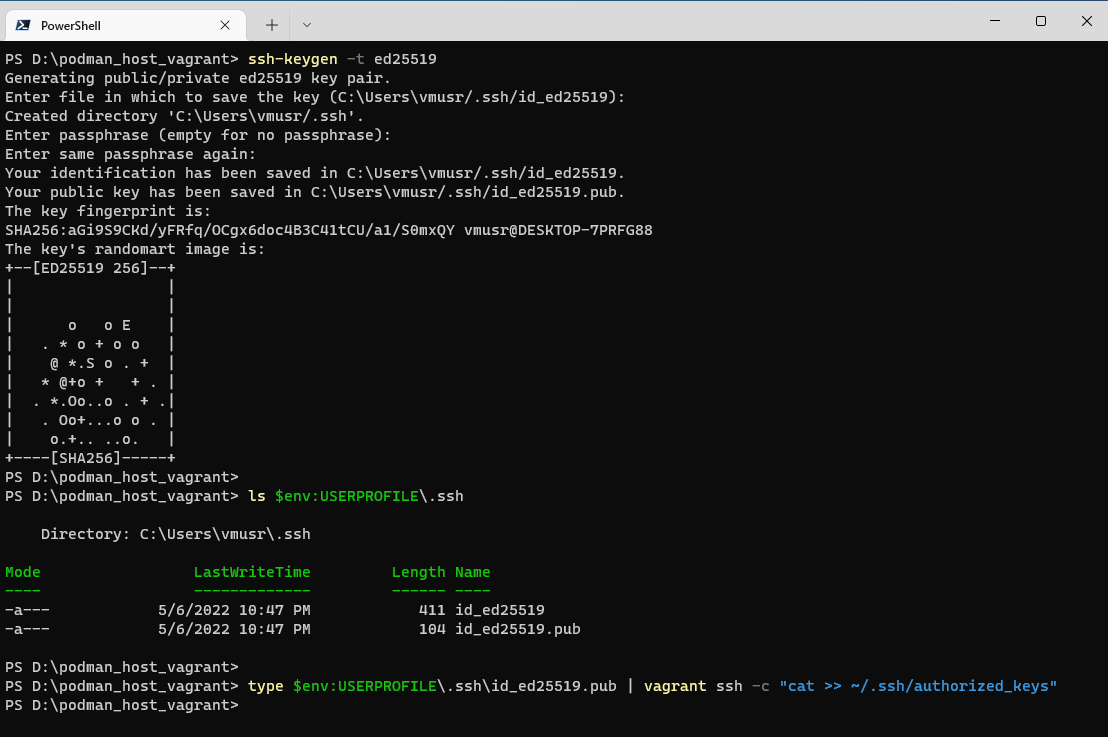
- Run
vagrant ssh-configto get the SSH host binding port of the Vagrant VM: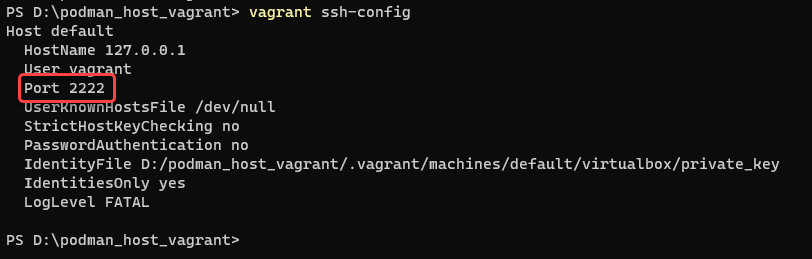
-
Run following command to get the remote socket path information of Podman in the Vagrant VM:
vagrant ssh -c 'podman --remote info --format={{".Host.RemoteSocket.Path"}}'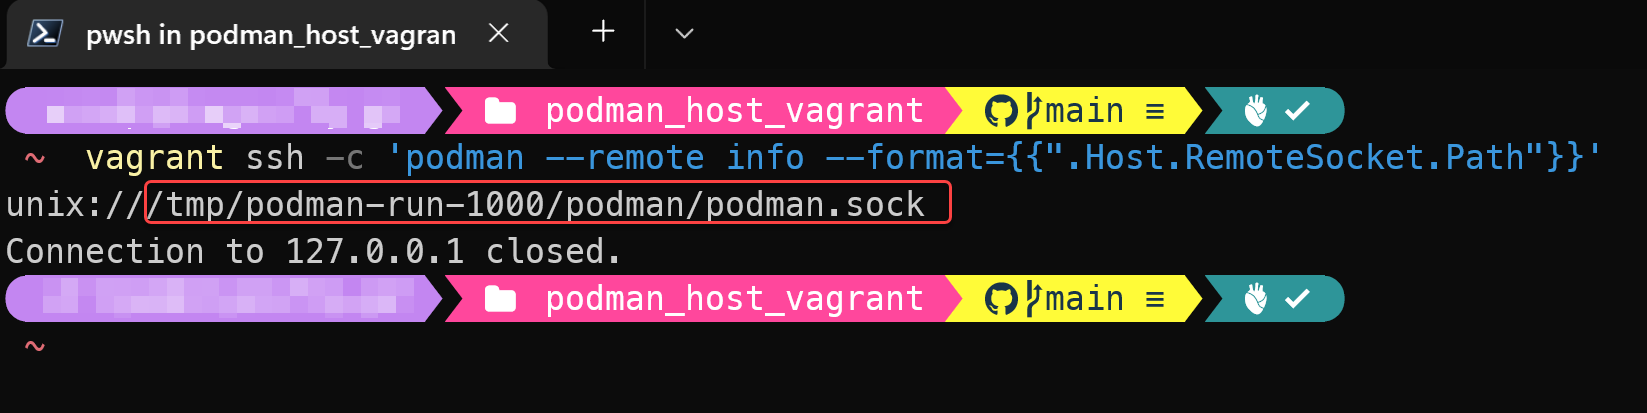
The above example shows the socket path is /tmp/podman-run-1000/podman/podman.sock. - Run following command to add a remote VM connection settings on Host Windows machine, this example is using Port 2222, remote socket path is /tmp/podman-run-1000/podman/podman.sock, and the connection name is vg_podman:
podman --remote system connection add vg_podman --identity $env:USERPROFILE\.ssh\id_ed25519 ssh://vagrant@127.0.0.1:2222/tmp/podman-run-1000/podman/podman.sockThen use
podman system connection listto verify the connection setting.

Additional notes
- After finish above steps, you can use
podman infoon Windows to verify remote container host connection status.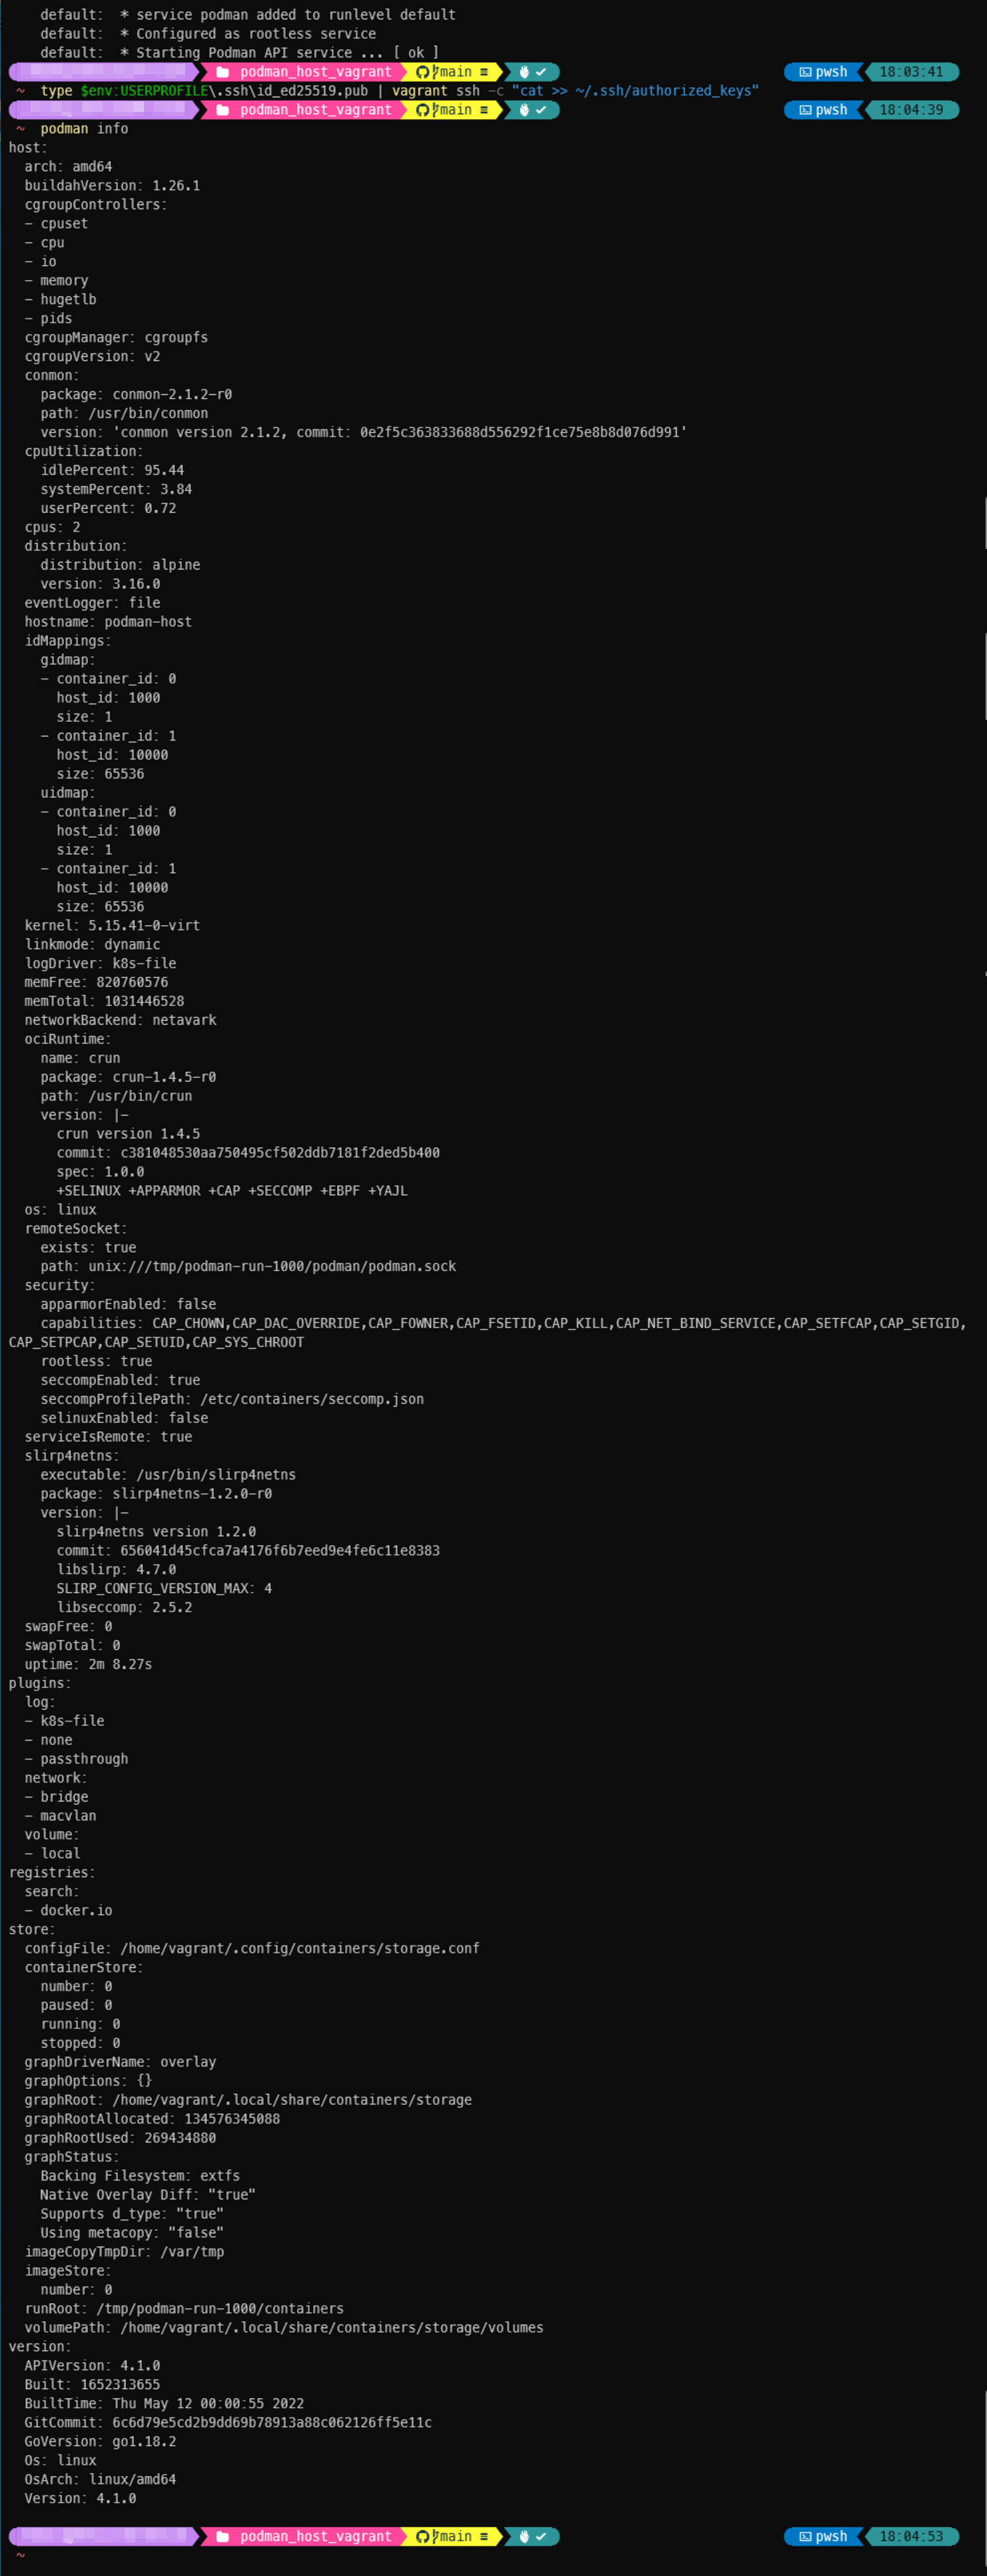 Also you can run following commands to verify podman is functional, able to pull images from both Redhat Quay(quay.io) & Docker Hub(https://hub.docker.com) registry and able to create rootless containers and communicates in pod:
 podman pod create --name mypod podman run -dt --name banner_01 --pod mypod quay.io/libpod/banner podman run -it --rm --pod mypod docker.io/curlimages/curl http://localhost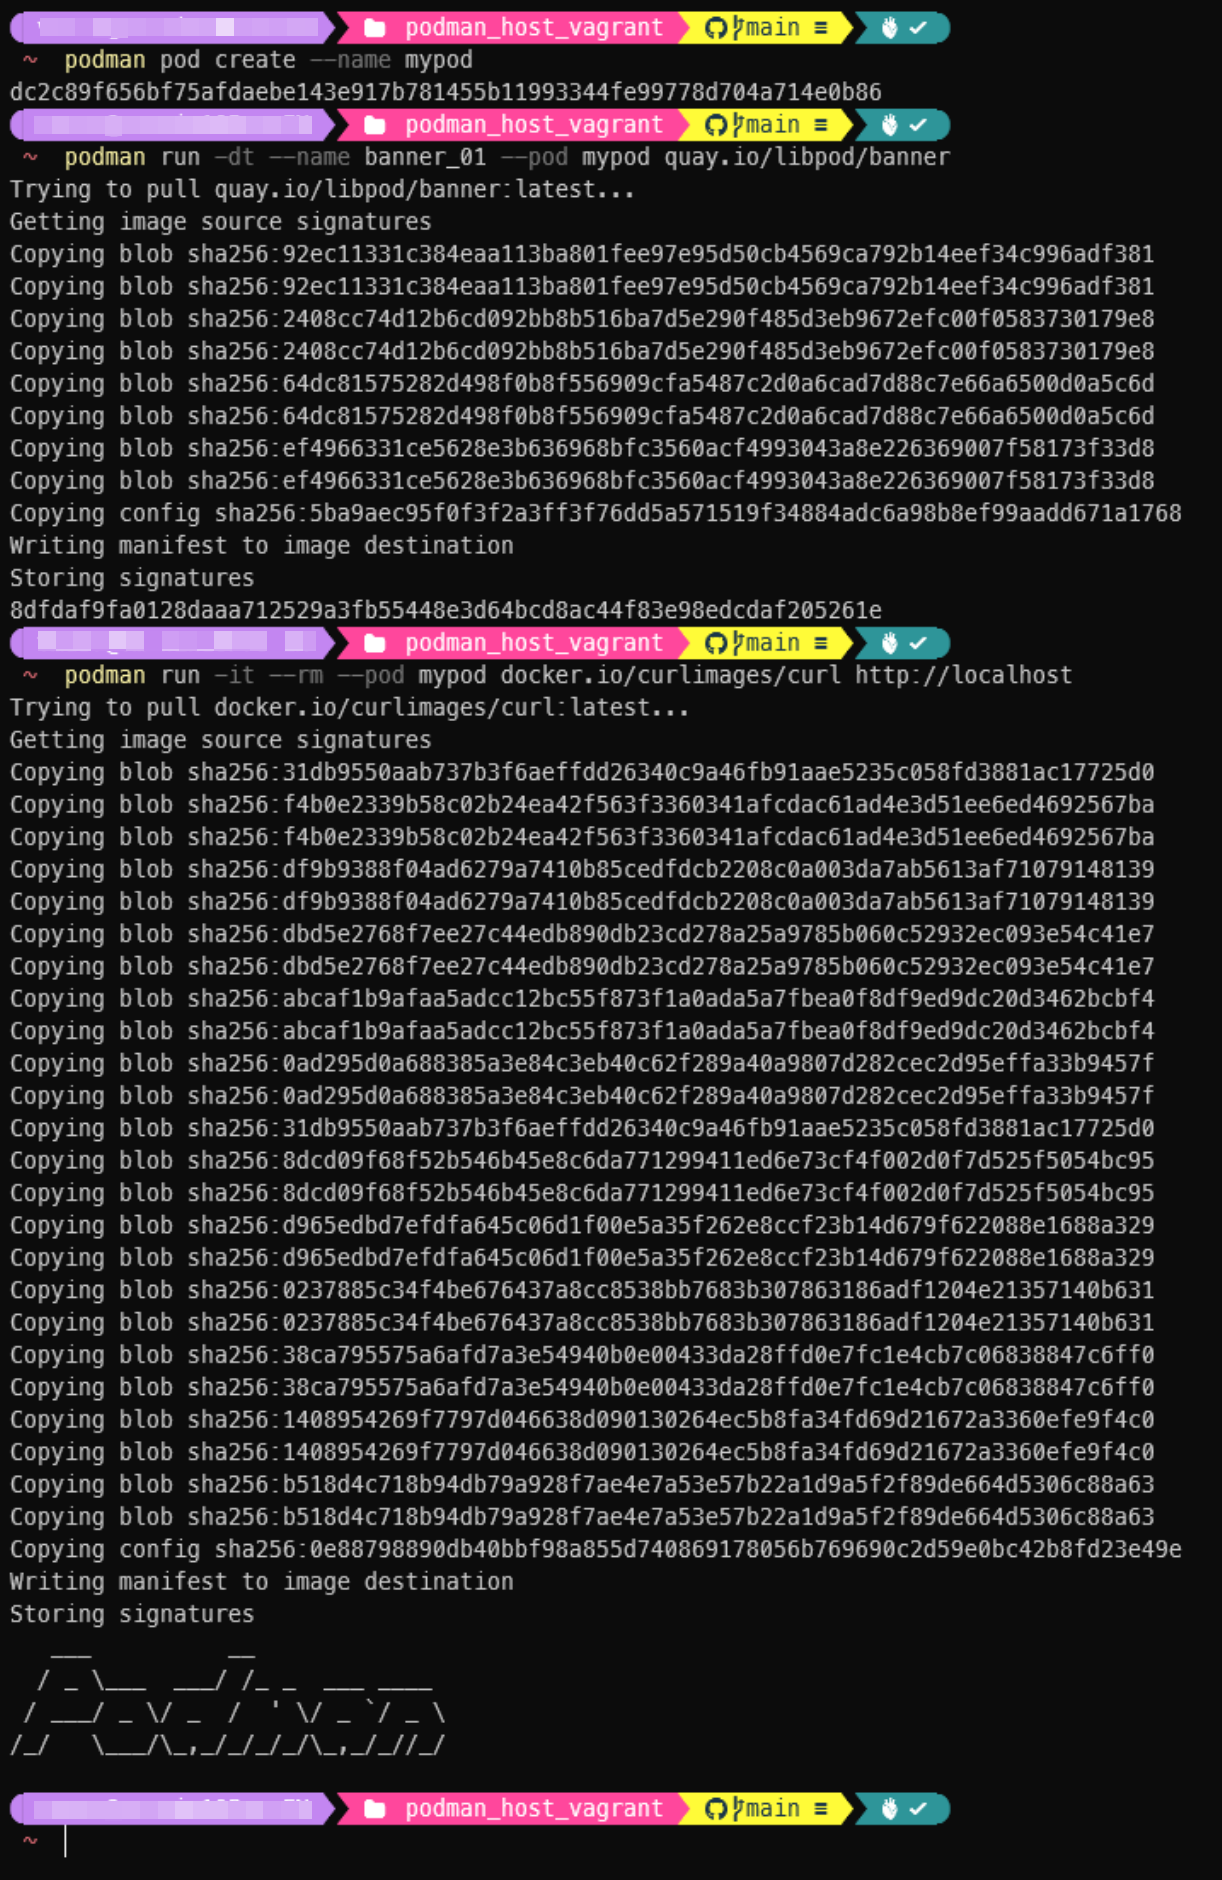
- If you need to recreate the VM, Invoke
vagrant destroy -fin the git clone folder, thenvagrant upagain. Only needs do above step 4. to copy the ed25519 public key from Windows into new VM. - The VM will automatically suspend when Windows system shutdown or reboot, it’s state can be known via invoke
vagrant statusin the git clone folder, you need to resume the VM by runningvagrant upto be able to use Podman host again.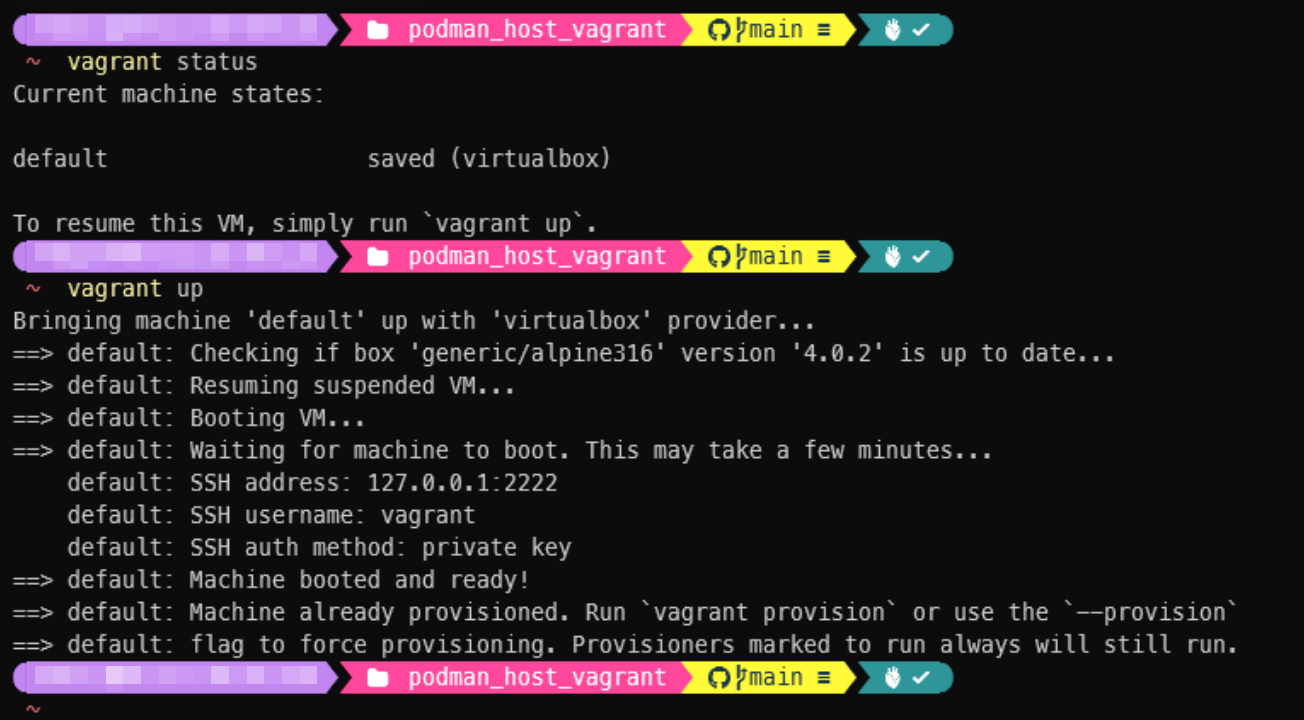
- The podman daemon inside VM is using the “rootless” mode , which means it cannot binding to port less than 1024 when invoke
podman runcommand. - Due to the limitation of the NAT virtual network card of VirtualBox, if you want to access the running containers that has custom binding port, you need to reach it by 2nd network card of VM, which is Host-Only mode and the IP address can be found by following command:
vagrant ssh -c 'ip addr show eth1'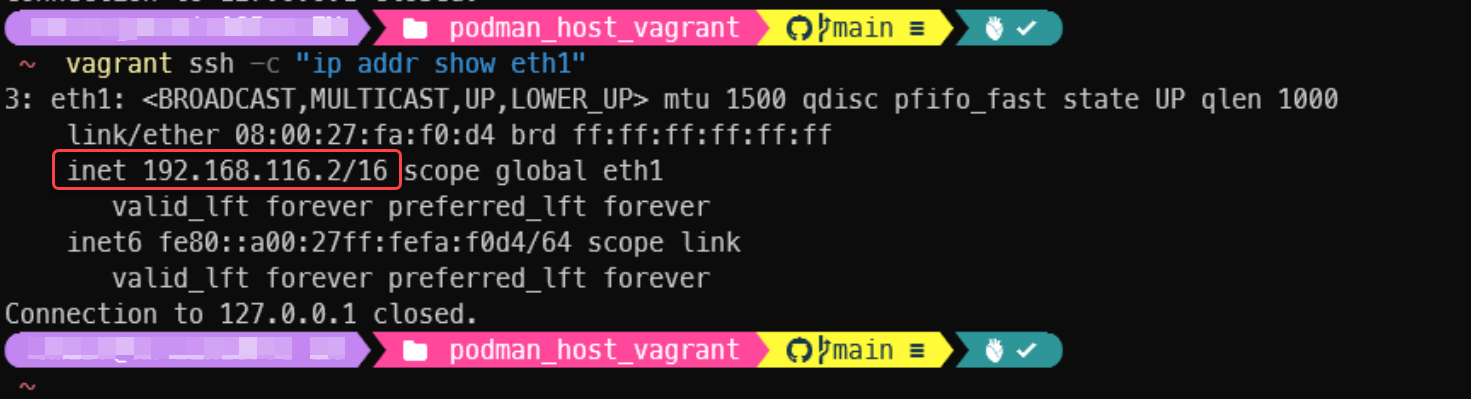
- If your Windows Host enable the Hyper-V or WSL 2 afterward, due to the underlying Hypervisor changed in Windows OS, you may experience the following error when
vagrant upan already provisioned VM: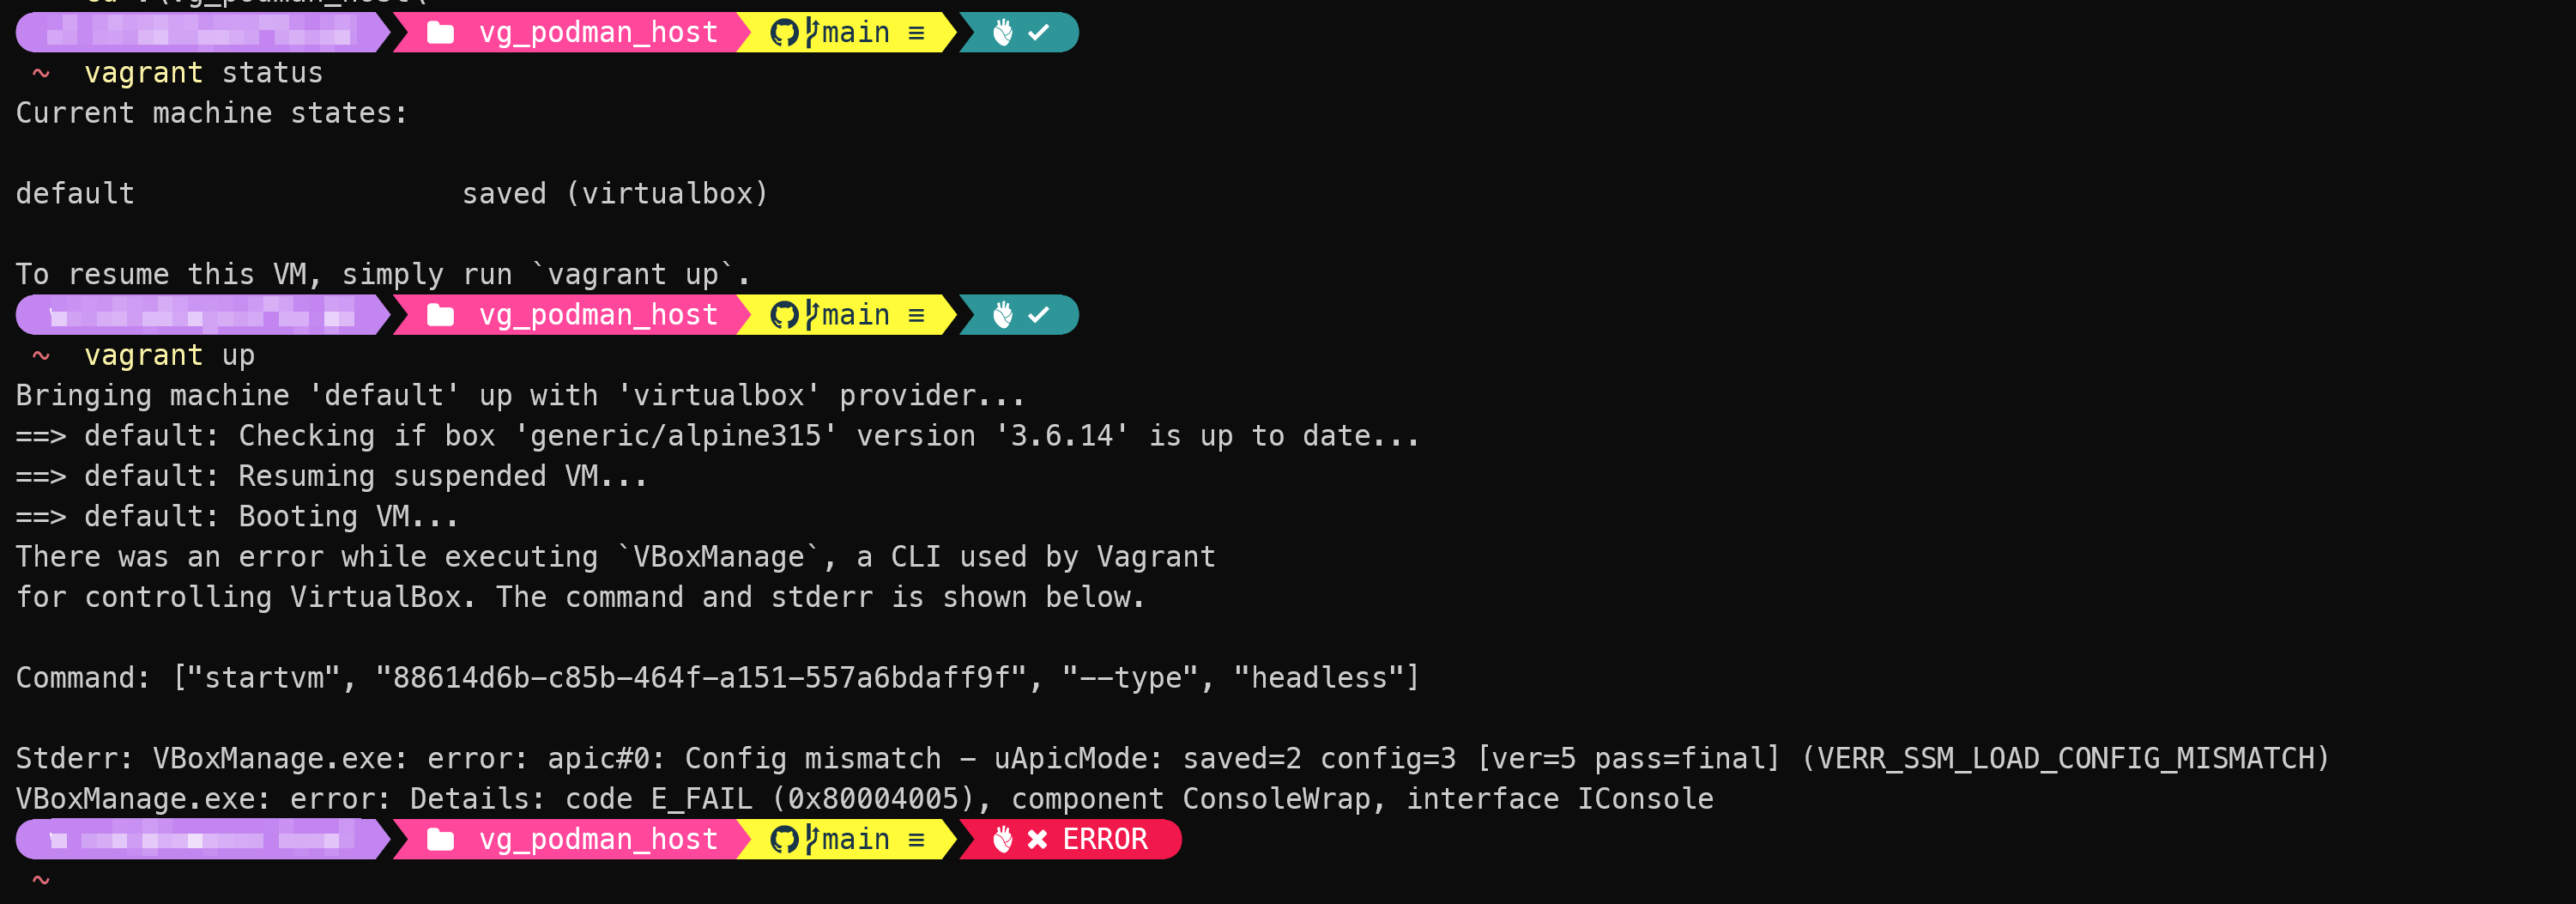 You need to recreate the VM that described in notes 2.